AI to beat a game [Code]
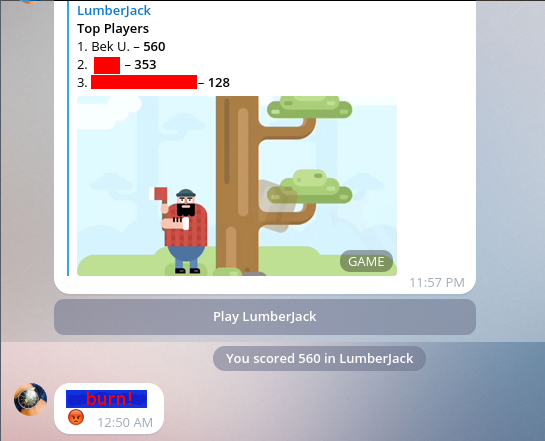
This post explains the Artificial Intelligence behind the bot that scored 560 on Telegram Lumberjack game including the code that you guys have been asking for.
Introduction
First of all, I apologize for not being able to quickly share the code with you guys. It has been just hectic for these past three days, so I just couldn’t even try doing it even if I wanted to. I wasn’t even expecting this many requests for the code. I really appreciate it!
Let’s get back to topic. So in order to explain the code I have to tell you how my machine is setup.
How my machine was setup
If you’d like to make use of the code you’ll have to make changes according to your machine. If you have questions doing it, please feel free to leave a comment. I’ll do my best to help you out.
- As you may have already figured it out, I use Linux.
This means, the code will only work on Linux. - I have a dual screen setup
- While I was working on the code my Chrome was on my laptop screen which is 1366x768.
- Chrome had Developer Mode open, therefore the document width was probably around 773 pixels.
For the program to work, you will need following modules
- numpy
- PIL/Pillow (for Python 3)
- PyAutoGui
- You also need python-gobject repository installed
Algorithm
Backstory
If you don’t want to read it, you can skip to the next section
So the basic idea behind the AI as a said in my previous post is check whether there is a branch above the lumberjack’s head or not. I first tried doing it using JavaScript. I wasn’t able to get the 2d image from the canvas that the game was using. I also figured that they are Pixi.js for the game. Although we could make our Lumberjack faster than the Flash I just didn’t want to waste my time figuring out how to use this library just to accomplish a single thing. So I summoned the mighty snake “Python” for help.

Part 1: Take a screenshot
There are many ways python lets you take a screenshot. However, since the game tries to beat you on your speed we should be able to take screenshots much faster. The best option is to use lower level API like Xorg and GTK (or DirectX if you use Windows).
from PIL import Image
from gi.repository import Gdk, GdkX11
from gi.repository.GdkPixbuf import Pixbuf

# Before running this code, run xwininfo to get the Window id (xid)
# Once you get the Window id (xid), copy it below. Notice, every time
# you restart the Chrome this id changes.
xid = 0x1400001
# We get the display and window using xid
display = GdkX11.X11Display.get_default()
window  = GdkX11.X11Window.foreign_new_for_display(display, xid)

# function to take a screenshot with defaults
def ImageGrab( bbox=(0, 0, window.get_width(), window.get_height()) ):
    # Get the pixel buffer for given region of bbox
    pixbuf = Gdk.pixbuf_get_from_window(window, bbox[0], bbox[1], bbox[2], bbox[3])
    # Convert the GDK Pixbuf into PIL Image
    im = Image.frombuffer(
        "RGB",
        (bbox[2], bbox[3]),
        pixbuf.get_pixels(),
        "raw",
        "RGB",
        pixbuf.get_rowstride(),
        1
    )
    return im
Part 2: Fun part
This is the section when you’ll need PyAutoGui installed. You’ll notice in the code that I have used mouse click instead of keyboard. Reason for that was I picked a position on the screen so that in case lumberjack gets hit by a branch, we won’t stop clicking but rather we click on the position where the play button is. It is up to you what you prefer to use: keyboard/joystick/mouse/your nose if you have a Library that will let you use your nose, but for a quick solution mouse click on given position should be perfect. If you’d like to expand the one-time solution to multiple use and with a single launch just start playing, then you’d have to advance the code. But for the time being, we’ll do a simple version.
Couple of notes before we look at the code. Since I had Developer Mode open on Chrome, the canvas got moved to the left side. Therefore, I had to figure out the position of the pixels manually. So eventually, I figured out the positions for the left branch:
- 320 pixels from the left side
- 250 pixels from the top
- 50 pixels wide
- 10 pixels high, but for the speed I had to sacrifice 95 pixels for the height. Basically, we check for a branch in a 50x95 region
The branch on the right side is just 100 pixels away from the starting position of the left branch.
import numpy as np
from pymouse import PyMouse
from time import sleep

# Initialize some basic variables
m = PyMouse()           # mouse
isLeft = True           # check which side are we on
branch = [161, 116, 56] # branch color in RGB

# Range was set because when I first ran the code - taking the screenshot time and
# the "branch" comparing time was not matching. Therefore the code needs to restart
# the game couple of times till the memory is filled up a little and our code gets
# a little slower. Plus, if the code doesn't work, we have to stop at some point and
# not run into an infinite loop.
for i in range(700):
    # Wait till we cut the tree and branch goes down a level. You may as weel play around
    # with this number. Making it smaller, makes lumberjack go faster. However you'll have
    # to change the height(95 px) to bigger number, so that your screenshot can capture
    # enough region to check for a branch. But be careful, if the region is too big, you'll
    # capture a branch before it moves into a right position.
    sleep(0.6)     if isLeft:
        # Had to cut down 1 pixel down on the width, because the last pixel was catching
        # the actual tree
        region = ImageGrab( (320, 250, 49, 95) )
    else:
        region = ImageGrab( (420, 250, 50, 95) )

    # Convert PIL Image into numpy array for the performance sake
    pixels = np.array(region.getdata())
    # Check for branch inside the numpy array, if found flip the isLeft switch
    if branch in pixels:
        if isLeft:
            isLeft = False
        else:
            isLeft = True
    # Since we didn't move when we found a branch, we do it now. This will also let us
    # to click on the play button if the lumberjack is dead. This way we'll be able to
    # play continuously till the speed is perfect.
    if isLeft:
        # Click the button on the given position:
        # 1620 on x-axis, 650 on y-axis, 1 - left click
        m.click(1620, 650, 1)
    else:
        # Click the button on the given position:
        # 1620 on x-axis, 650 on y-axis, 1 - left click
        m.click(1720, 650, 1)
Since I have dual screen setup, my left screen is 1280x1024 and my right screen is 1366x768. Total 2646x1024. Therefore the mouse click positions are so big on the x-axis.
Conclusion
